> ## Documentation Index
> Fetch the complete documentation index at: https://docs.cloudsquid.io/llms.txt
> Use this file to discover all available pages before exploring further.
# Workflow Builder Quick Start Guide
> A walk through of how to create a simple end to end data workflow
# Workflows Quick Start Guide
**Prerequisites:** Complete the [Extraction Agent Quickstart](/quickstart) first and have at least one extraction agent ready before following this guide.
## Overview
The Workflow Builder connects Cloudsquid to thousands of tools and services, allowing you to automate end-to-end data processes. Workflows are only available for our paid users. If you're interested in a Free Trial you can fill out the form that will appear when you click on this feature.
In this quick start, we'll build a workflow that:
1. Starts with an email trigger that captures an attached invoice.
2. Processes the attachment through an Extraction Agent, which is an Action node
3. Sends the extracted data to a Google Sheet.
***
### 1. Create a Workflow
Workflow are containers for your automated process.
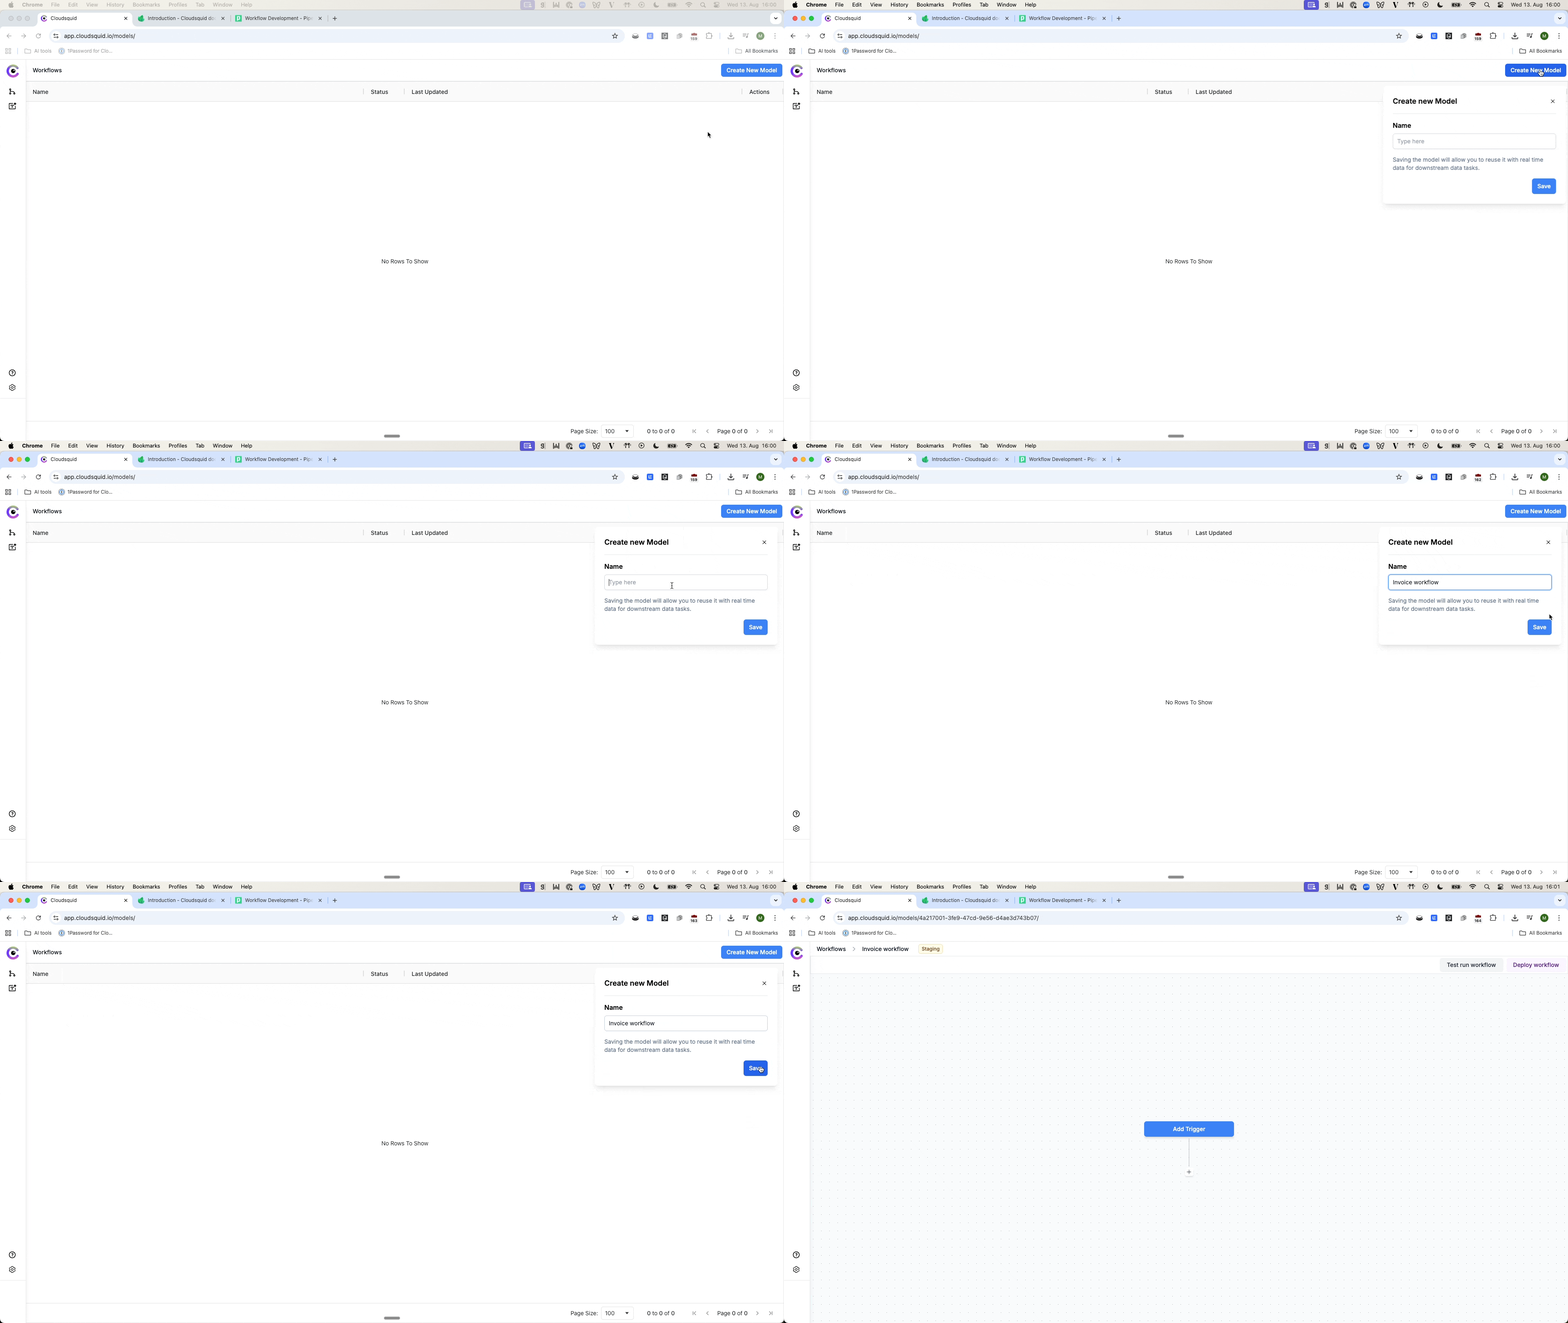
1. In the left-hand panel, go to **Workflows**.
2. Click **Create Workflow**.
3. Give it a clear, descriptive name so you and your team can identify it later and hit Save
 ***
### 2. Add an Email Trigger
Email is one of the most common sources of incoming documents for a business. The Workflow Builder lets you build email Trigger in two ways:
* **Direct integrations** with Outlook or Gmail, where you set conditional triggers.
* **Managed Cloudsquid inbox**, which generates a unique email address for automated ingestion.
For this quick start, we'll use the managed inbox:
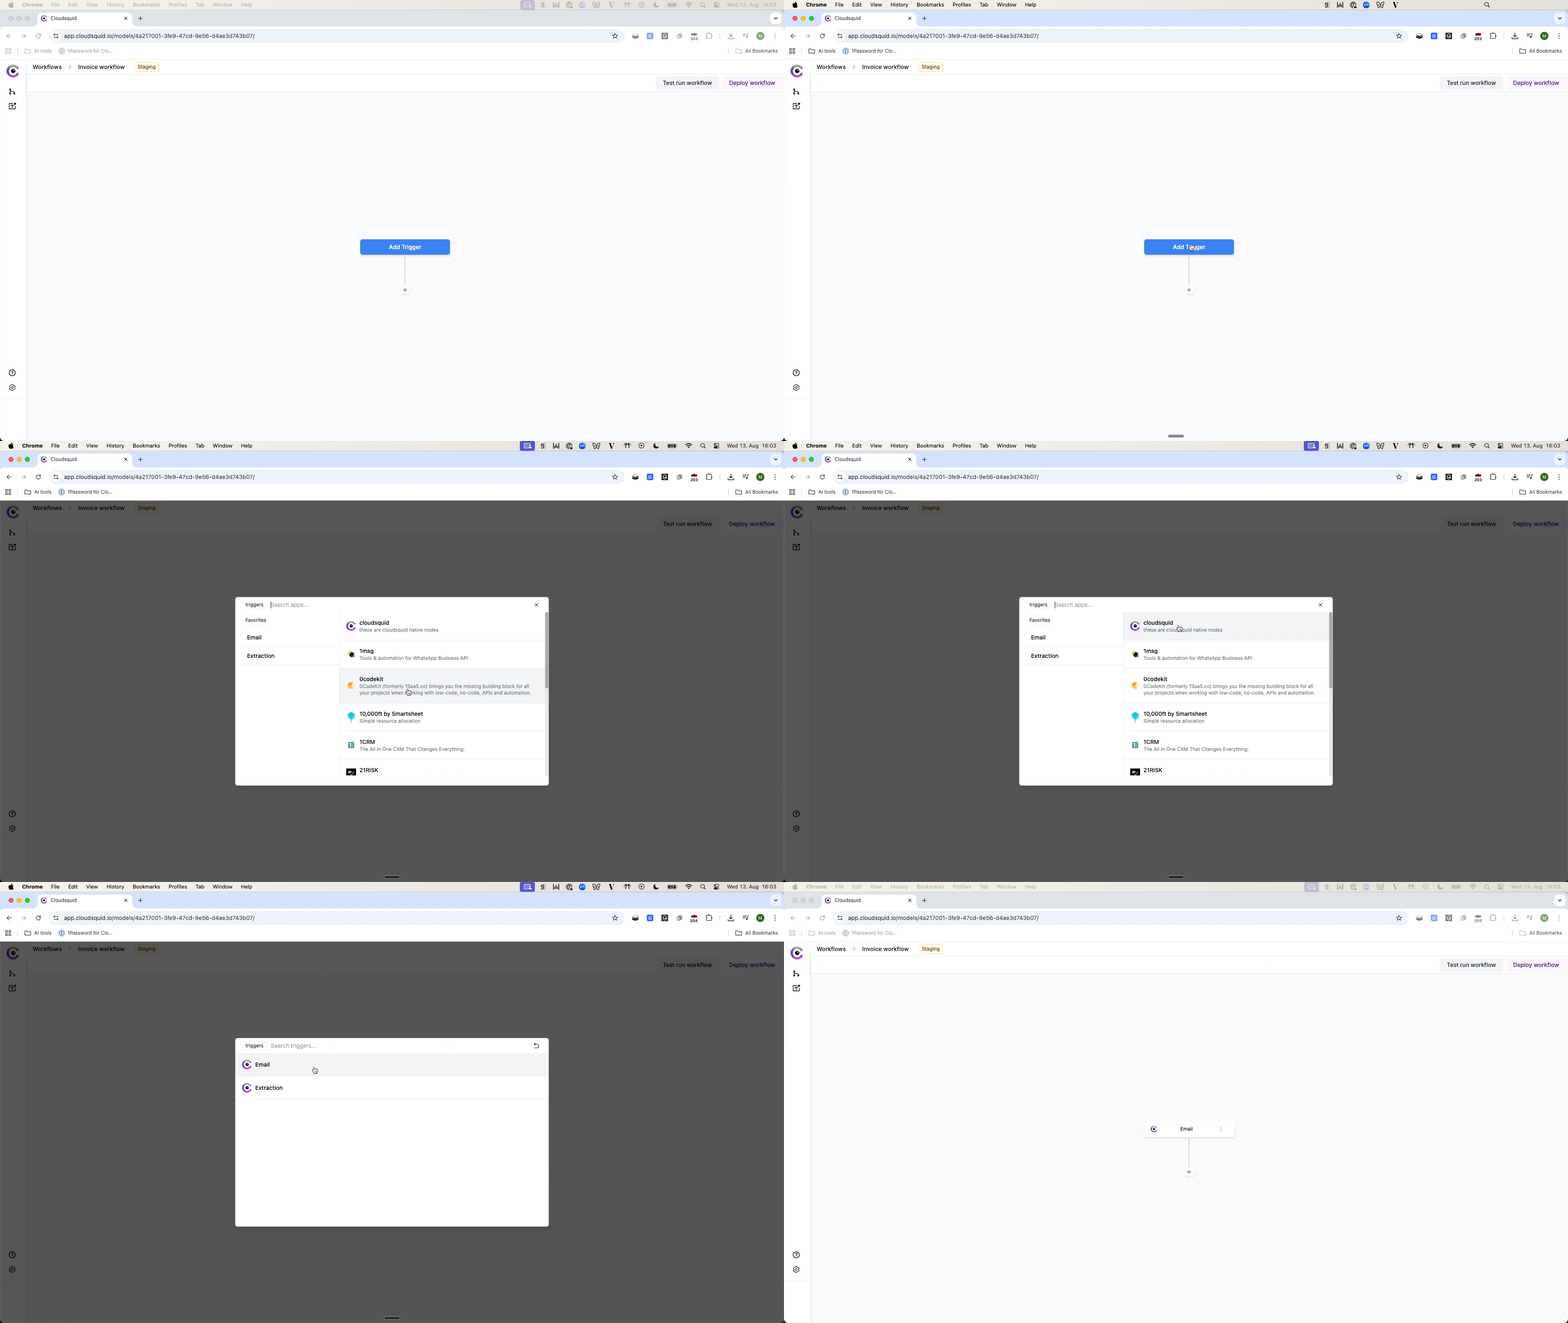
1. Click **Add Trigger** → choose the **Email** node from the Cloudsquid native nodes.
***
### 2. Add an Email Trigger
Email is one of the most common sources of incoming documents for a business. The Workflow Builder lets you build email Trigger in two ways:
* **Direct integrations** with Outlook or Gmail, where you set conditional triggers.
* **Managed Cloudsquid inbox**, which generates a unique email address for automated ingestion.
For this quick start, we'll use the managed inbox:
1. Click **Add Trigger** → choose the **Email** node from the Cloudsquid native nodes.
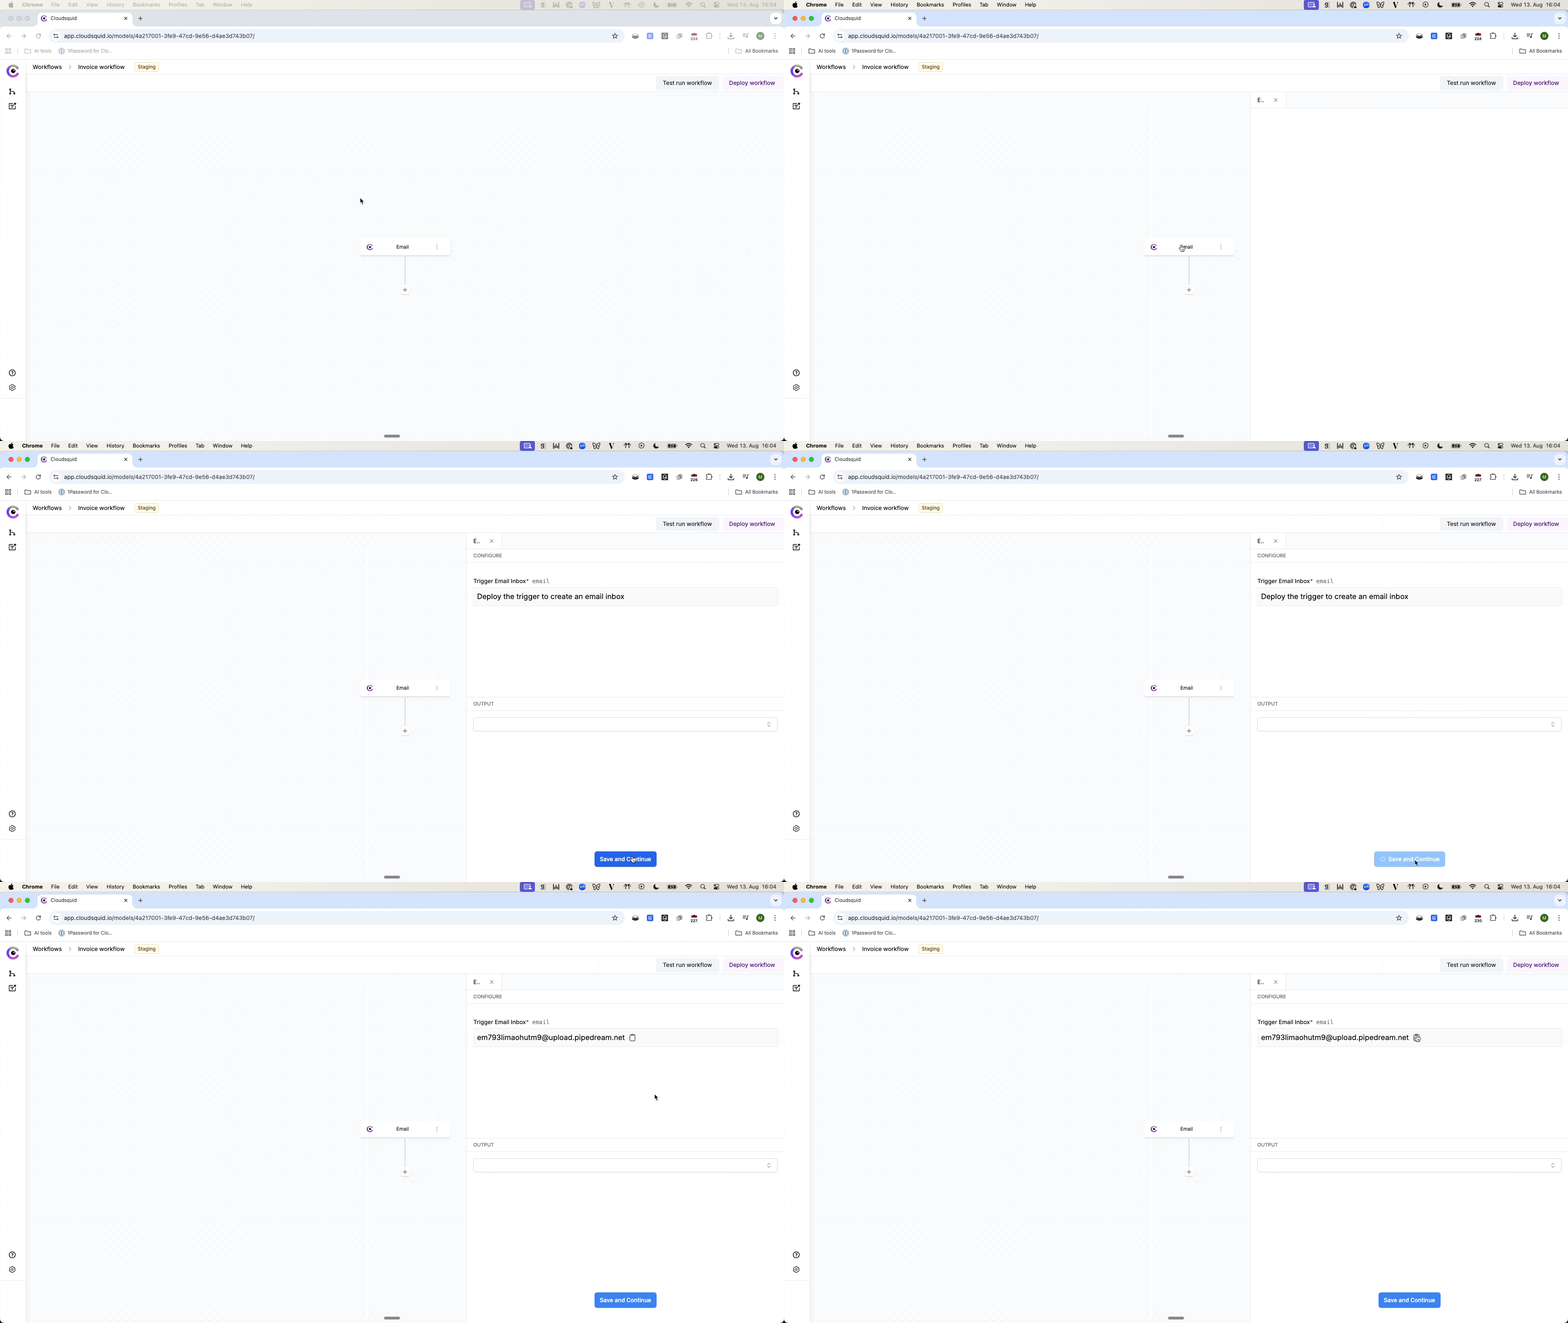
 2. In the Email node settings, click **Save and Continue** to generate your email address.
 3. Copy this address and send a test email to it from your separate email account with an attachment (e.g., an invoice PDF).
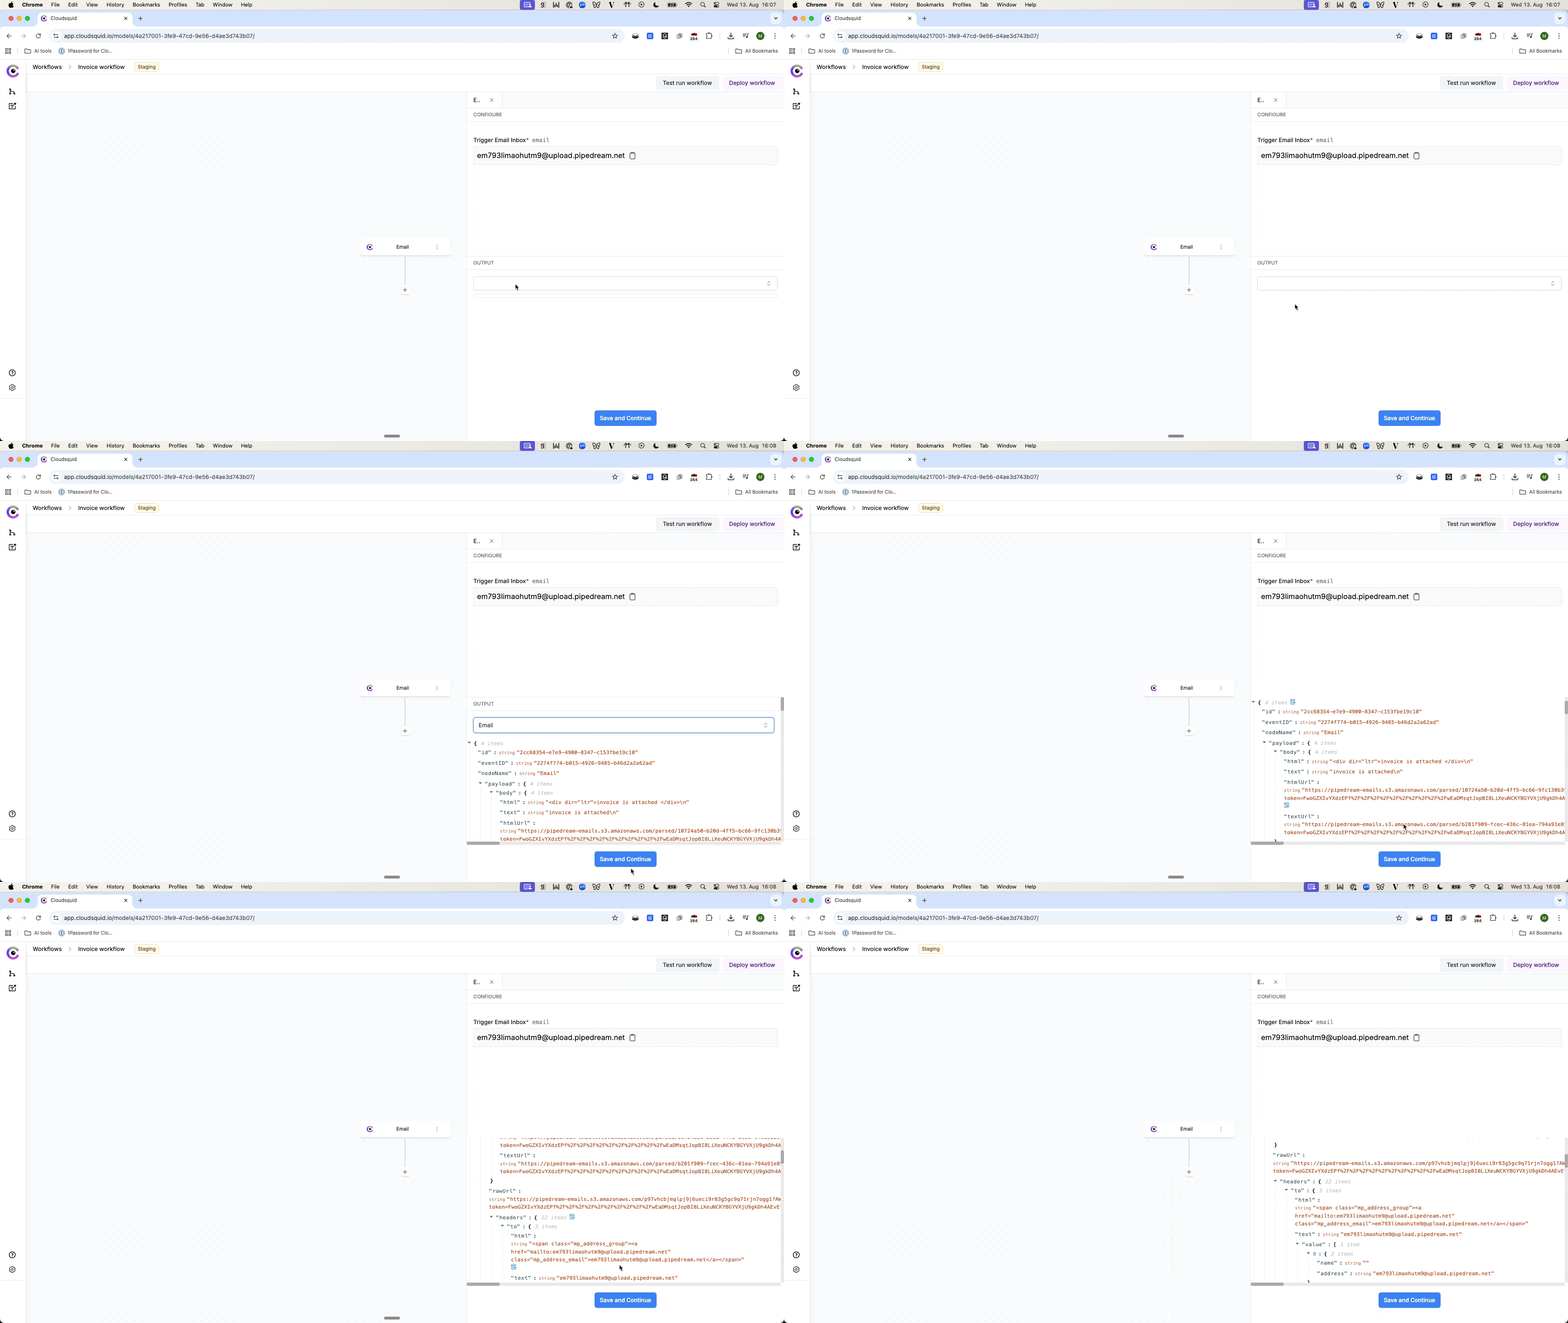
4. After 20–30 seconds, the email appears in the node's **Outputs**. Click the "Email" output to see available data.
3. Copy this address and send a test email to it from your separate email account with an attachment (e.g., an invoice PDF).
4. After 20–30 seconds, the email appears in the node's **Outputs**. Click the "Email" output to see available data.
 ***
### 3. Add an Extraction Agent Action
Extraction Agents process and structure your document data. You should have one ready from the [Extraction Agent Quick Start Guide](/quickstart).
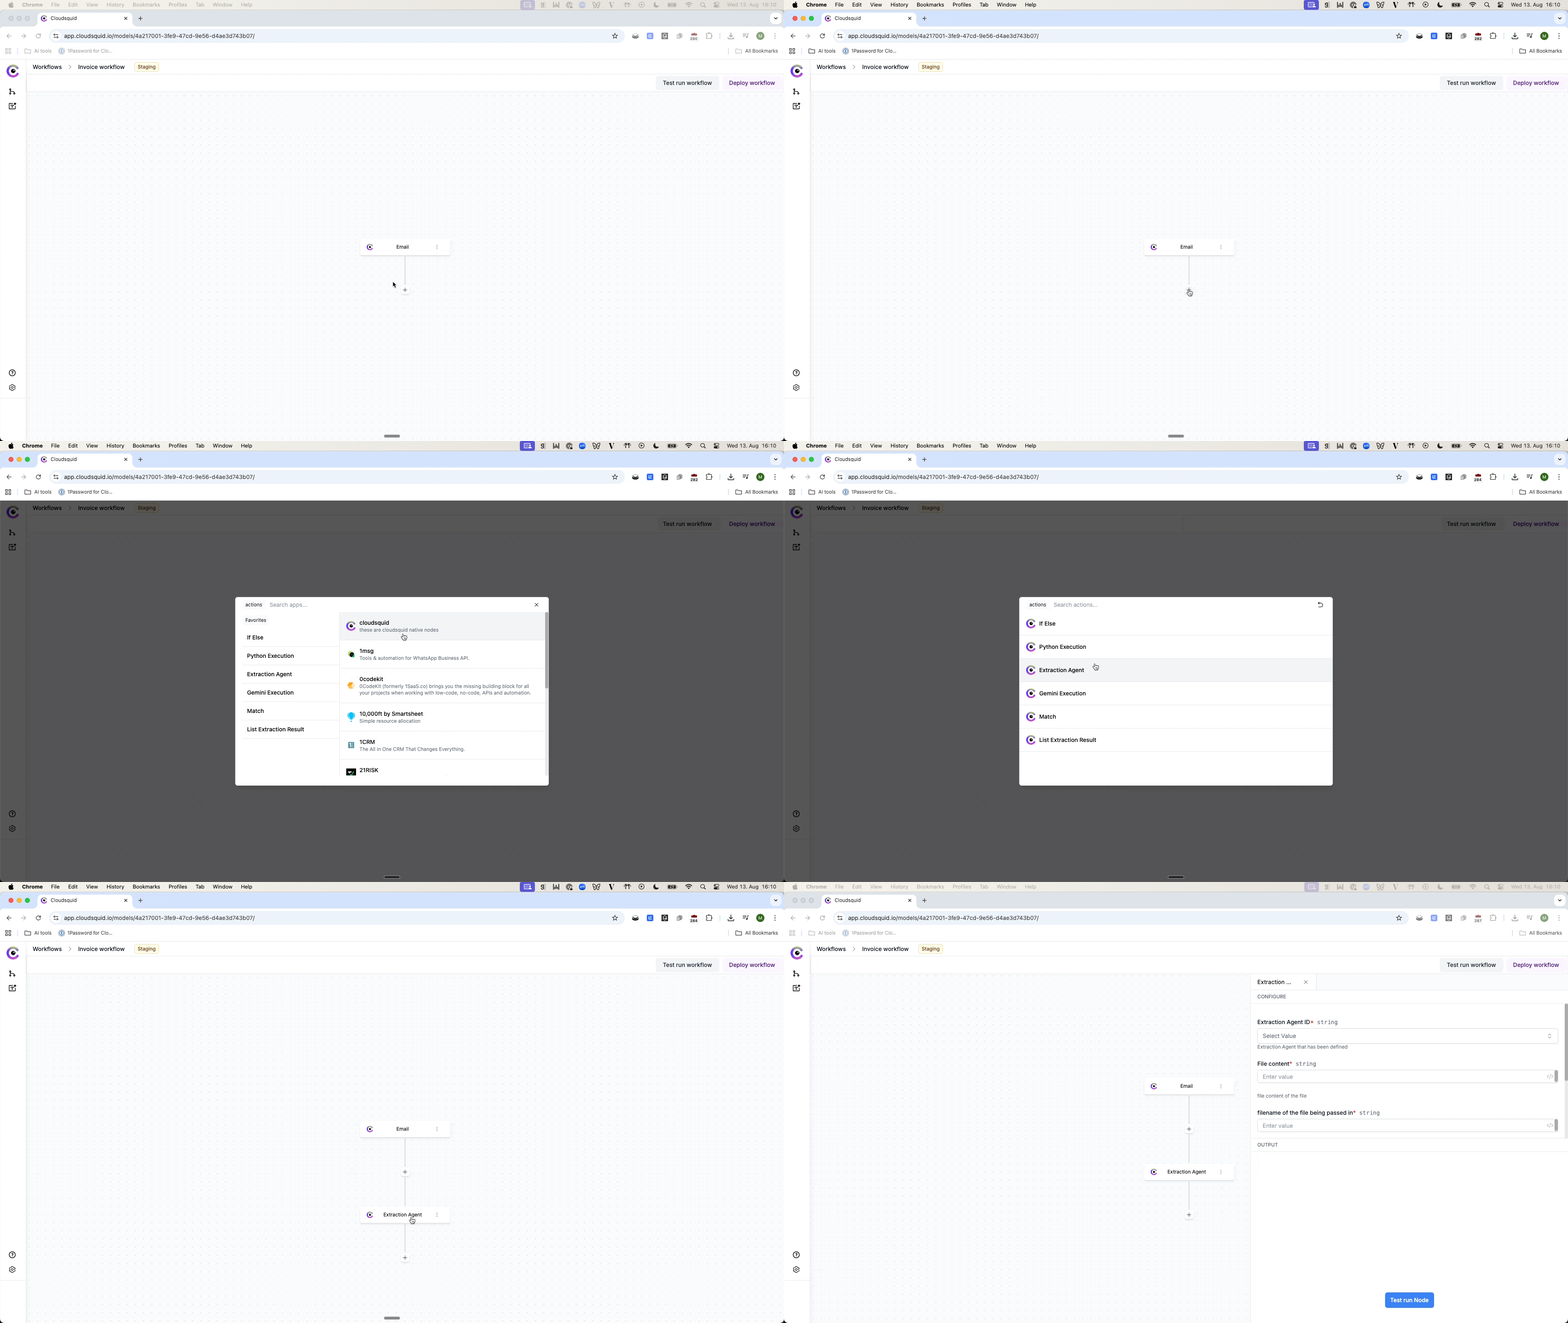
1. Click the **+** after your trigger → choose **Extraction Agent** from the native nodes.
***
### 3. Add an Extraction Agent Action
Extraction Agents process and structure your document data. You should have one ready from the [Extraction Agent Quick Start Guide](/quickstart).
1. Click the **+** after your trigger → choose **Extraction Agent** from the native nodes.
 2. In the settings:
* **Extraction Agent ID** – choose your pre-created agent.
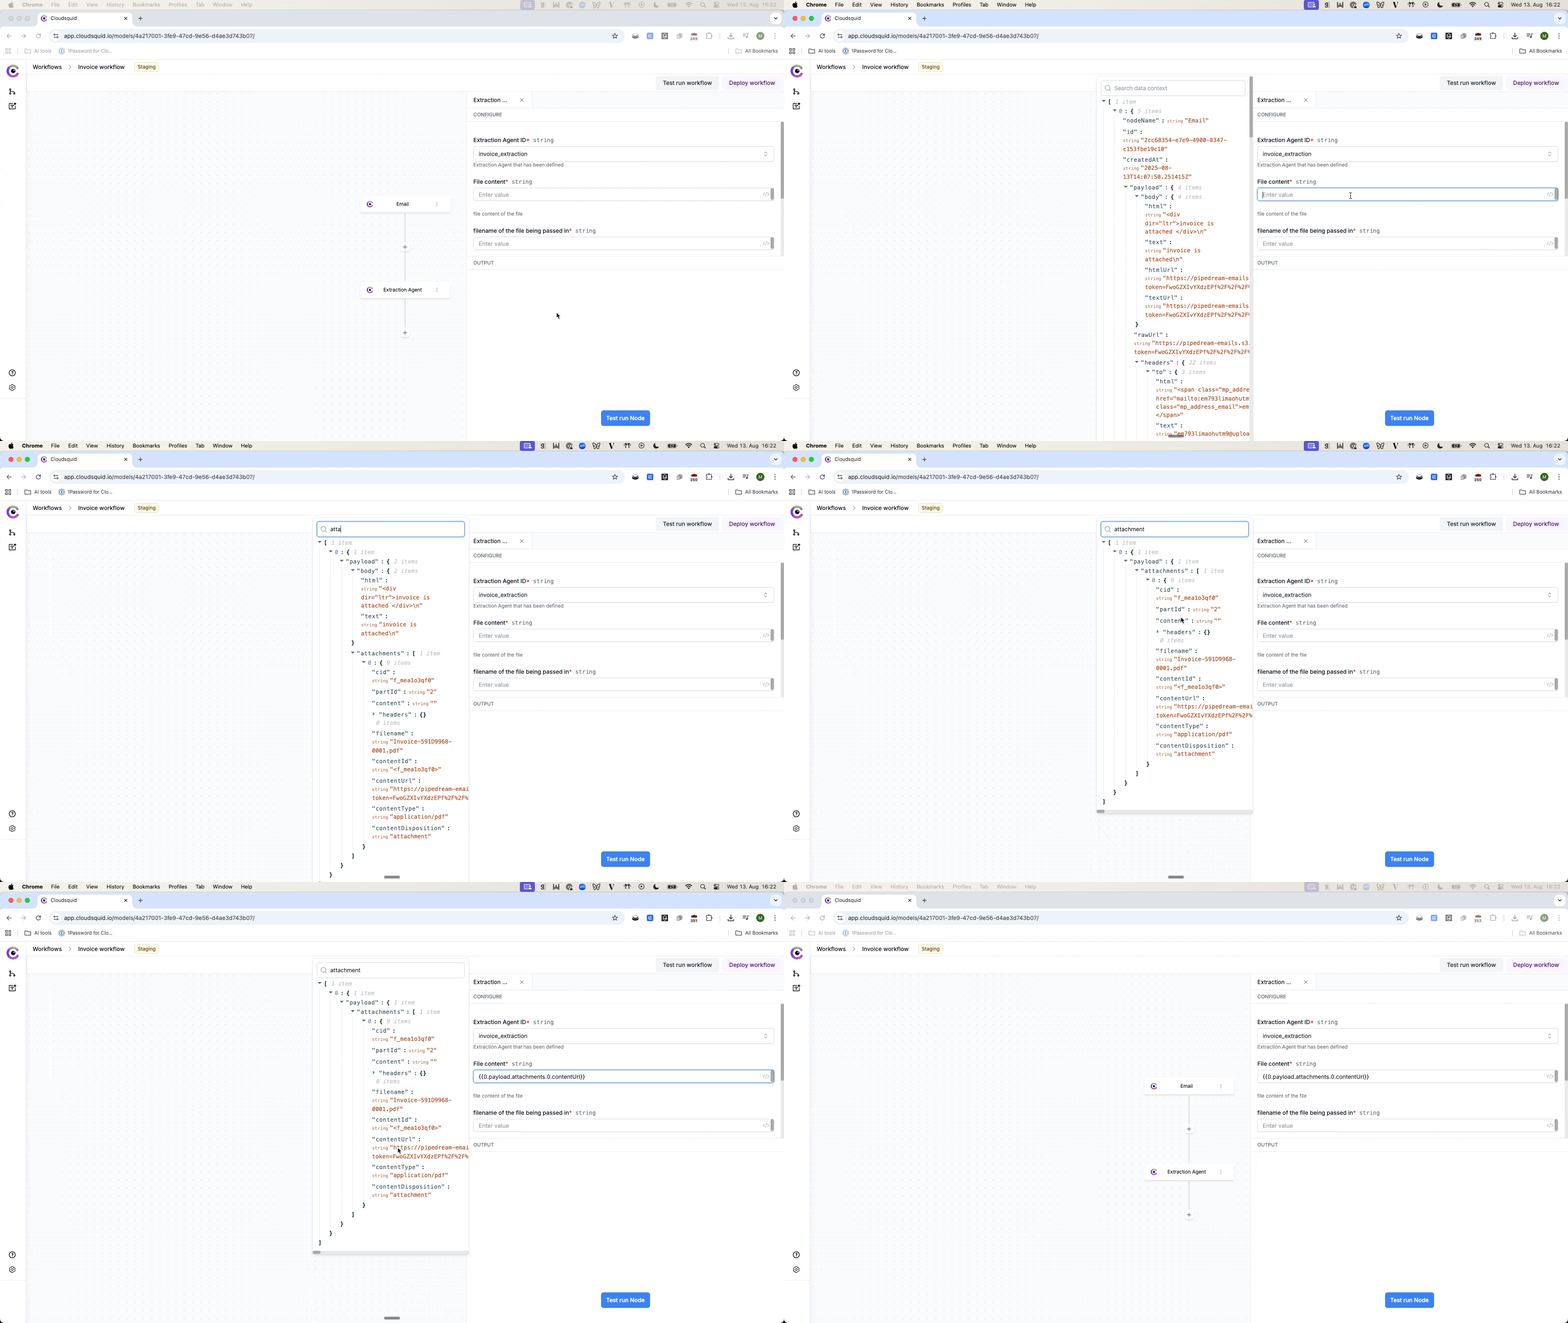
* **File content** – in the data viewer, search "attachments" and select the `contentUrl` value.
2. In the settings:
* **Extraction Agent ID** – choose your pre-created agent.
* **File content** – in the data viewer, search "attachments" and select the `contentUrl` value.
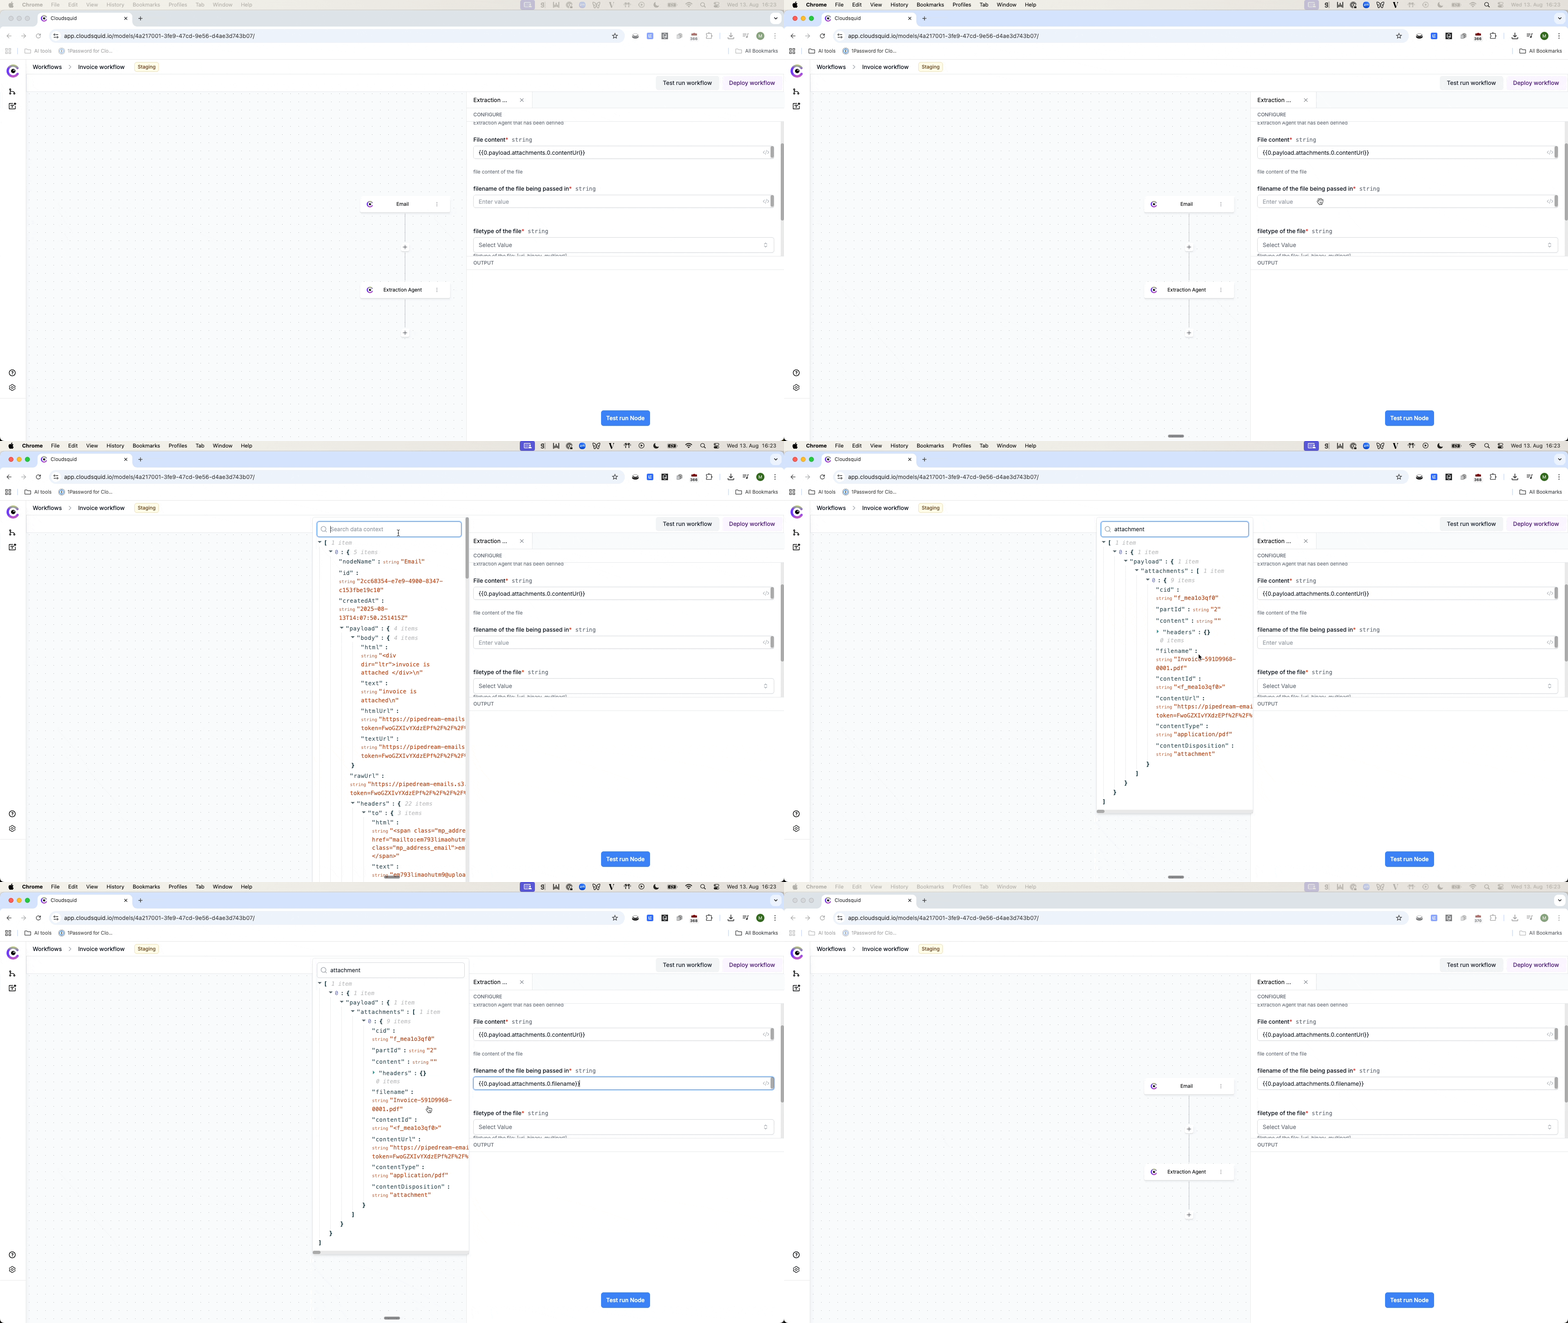
 * **Filename** – search "attachments" and select the `filename` value.
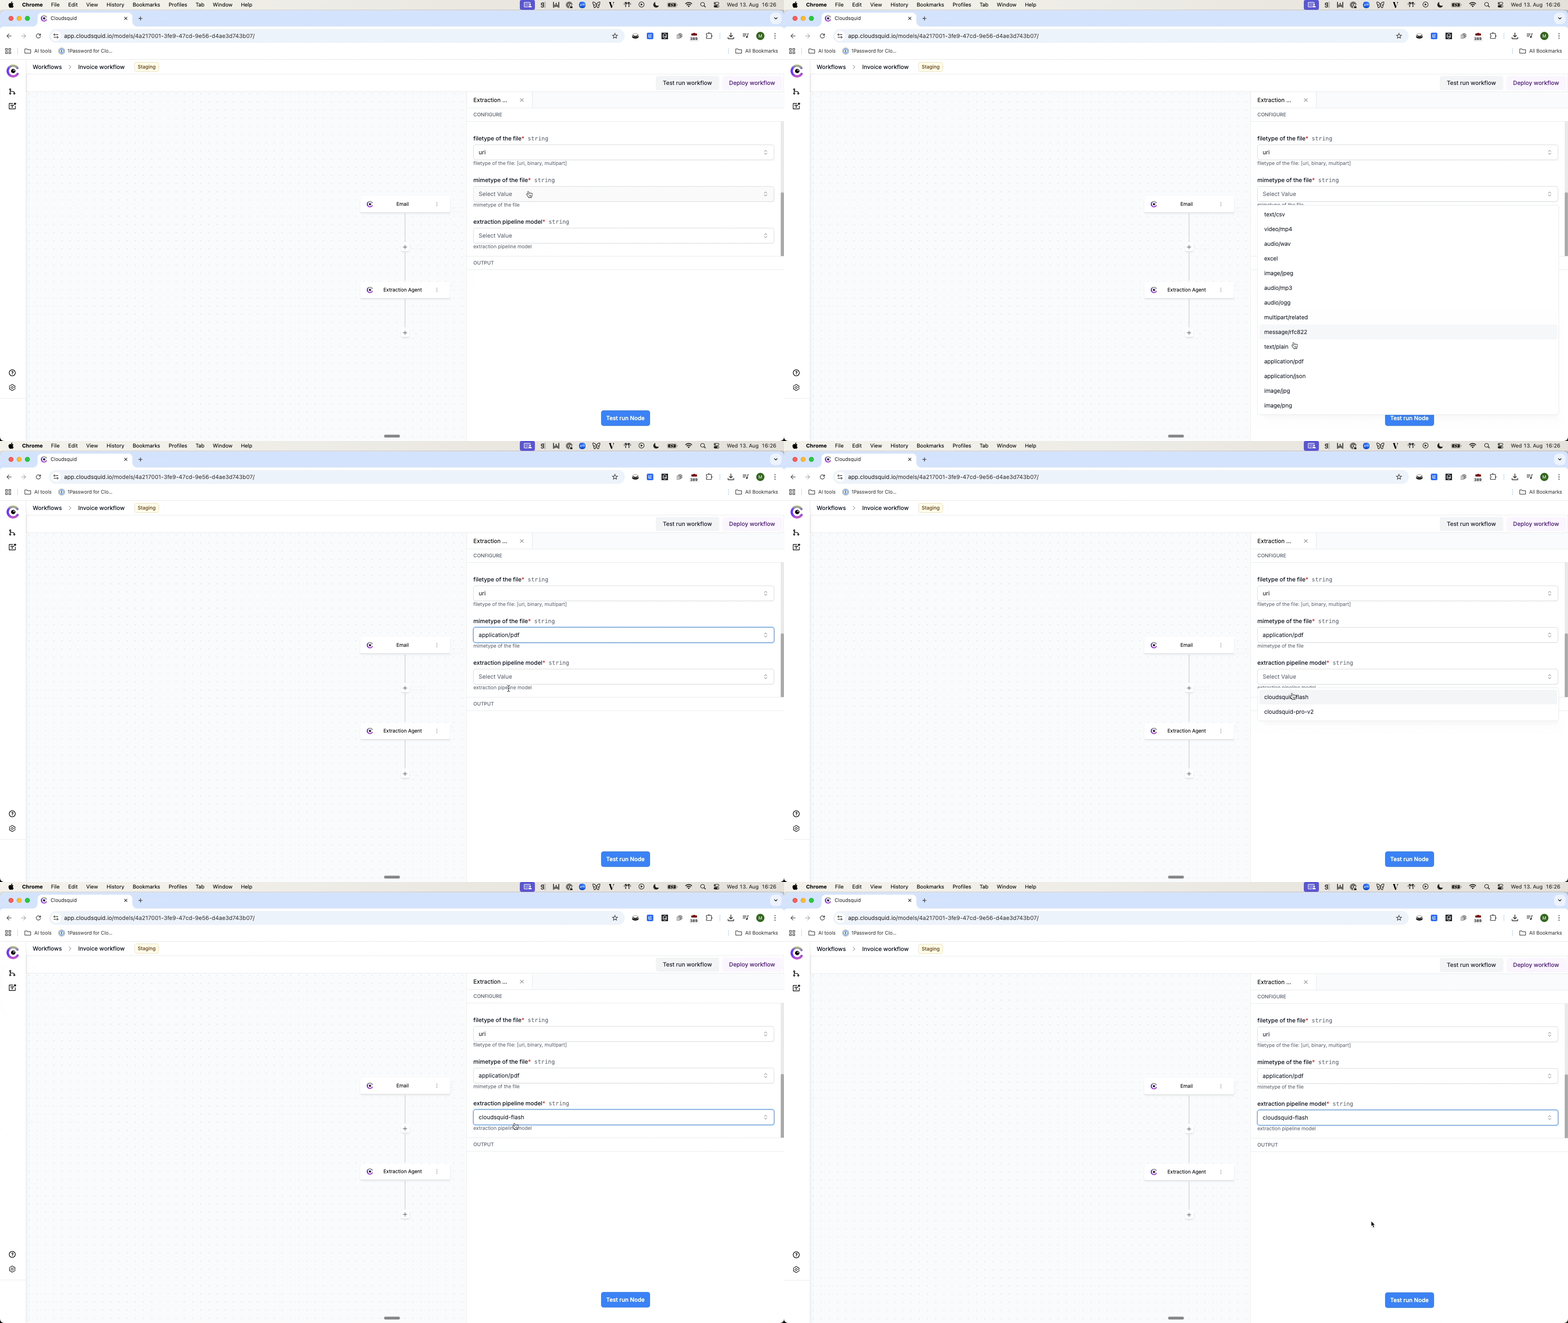
 * **Filetype** – select `uri` since we access this file via its URL link
* **Mimetype** – choose the correct type, e.g., `application/pdf`.
* **AI Model** – choose **cloudsquid-flash** for speed and lower cost.
* **Filetype** – select `uri` since we access this file via its URL link
* **Mimetype** – choose the correct type, e.g., `application/pdf`.
* **AI Model** – choose **cloudsquid-flash** for speed and lower cost.
 3. Click **Test run Node** to verify extraction. Results will appear in the OUTPUT viewer.
***
### 4. Add a Google Sheets Action
We'll now send the extracted data to Google Sheets:
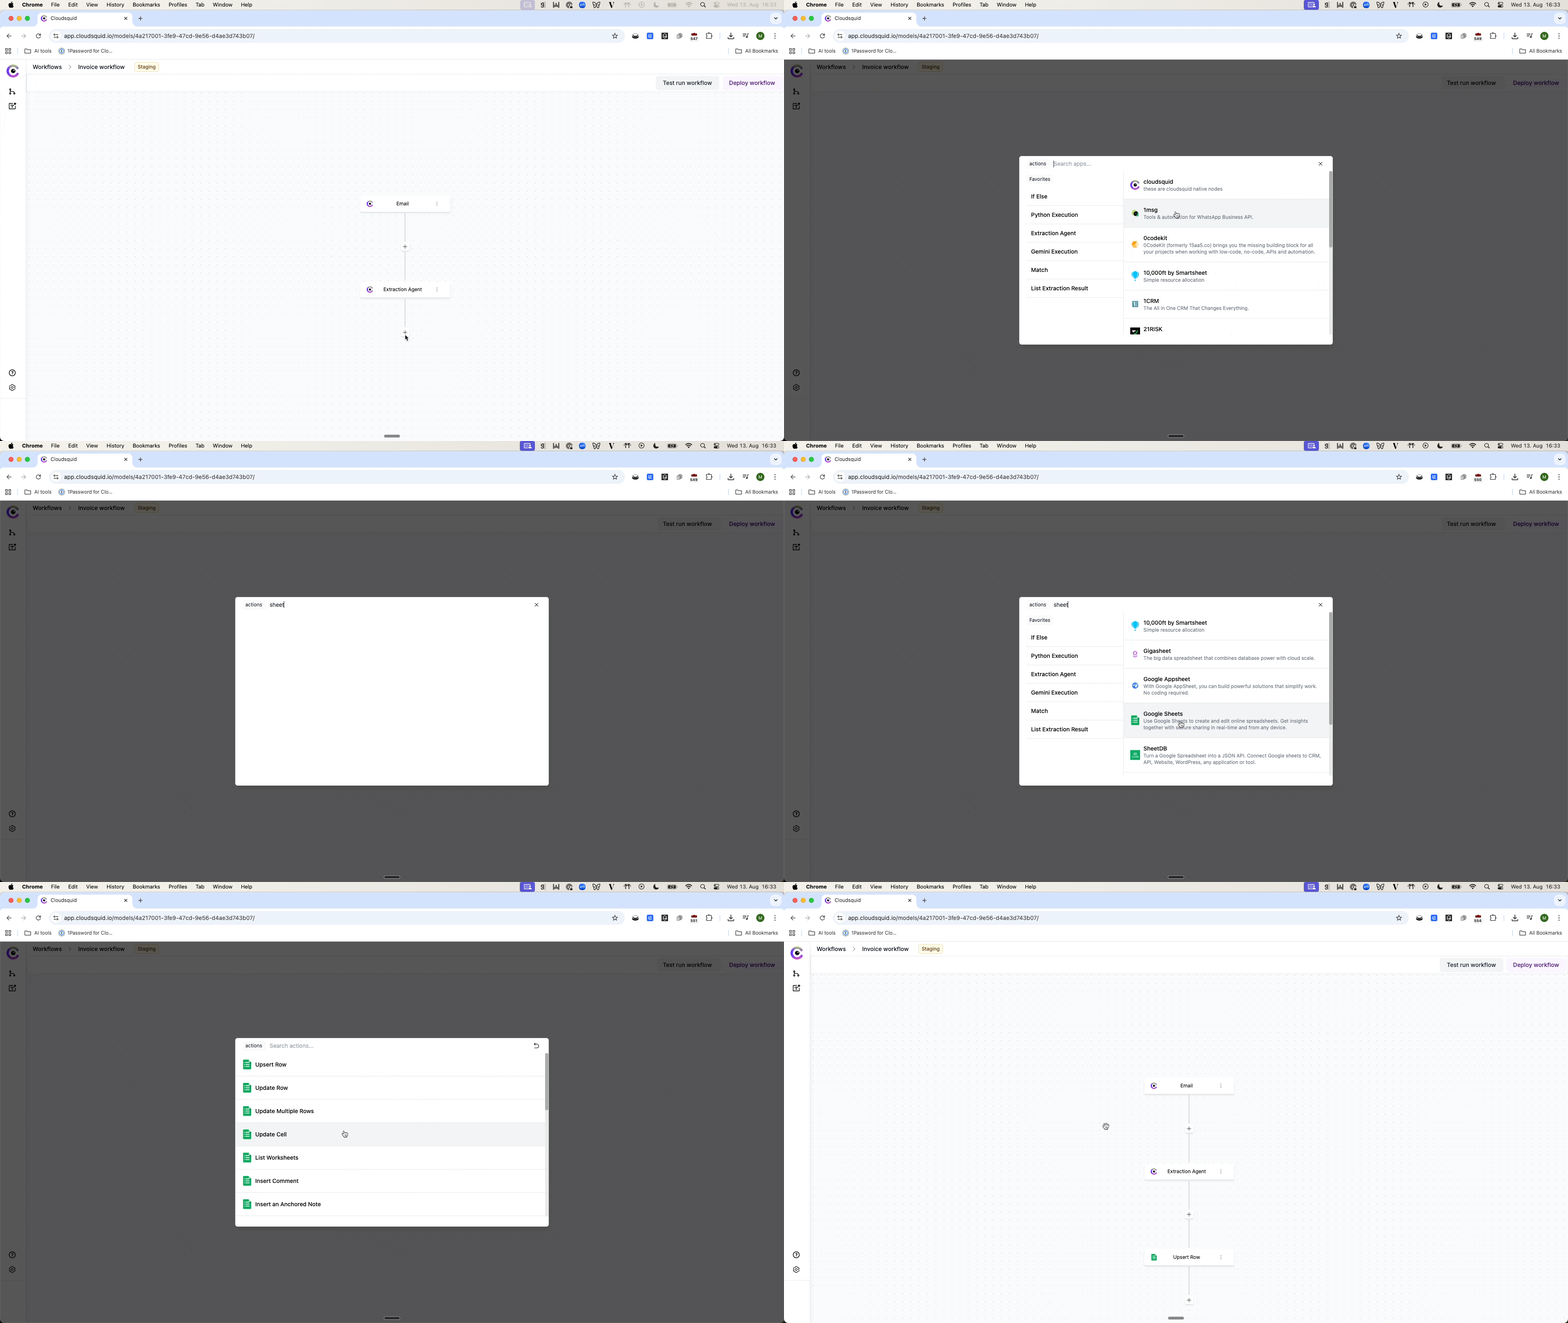
1. Click the **+** after the Extraction Agent node → search for **Google Sheets**.
2. Choose the **Upsert Row** action (adds new rows without overwriting existing data).
3. Click **Test run Node** to verify extraction. Results will appear in the OUTPUT viewer.
***
### 4. Add a Google Sheets Action
We'll now send the extracted data to Google Sheets:
1. Click the **+** after the Extraction Agent node → search for **Google Sheets**.
2. Choose the **Upsert Row** action (adds new rows without overwriting existing data).
 3. Create a blank Google Sheet (e.g., "invoice demo") in your Google account.
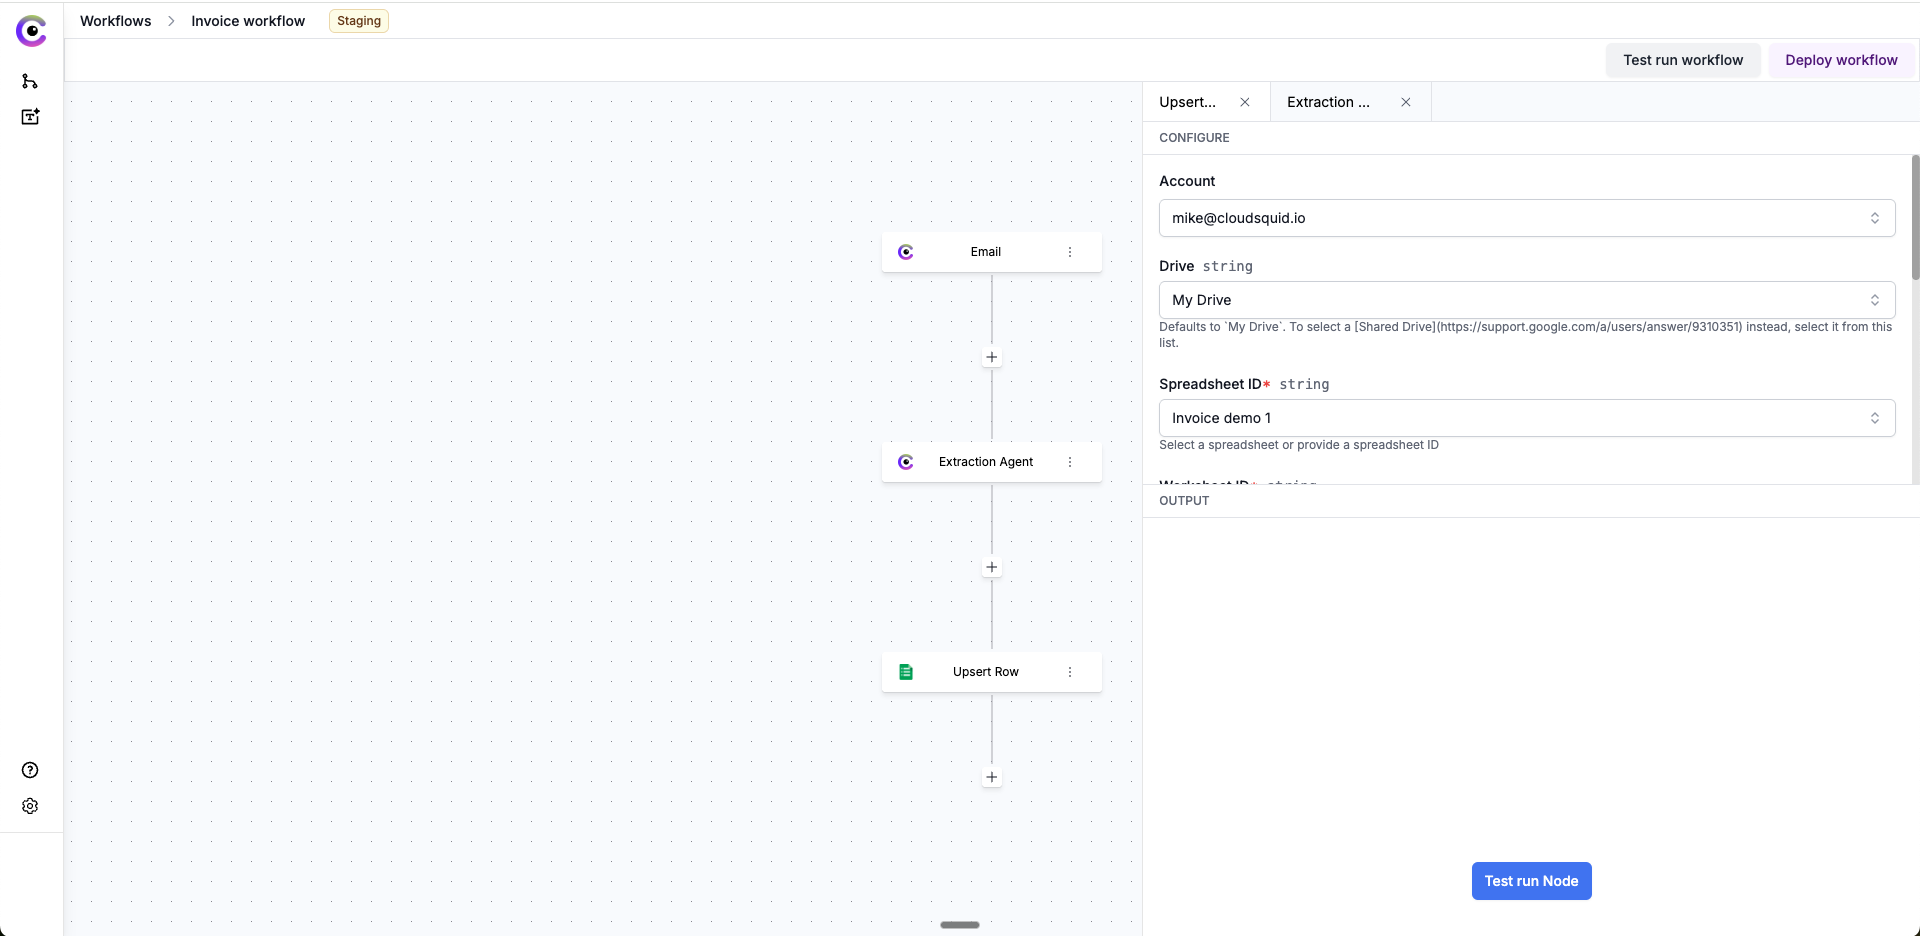
4. In the Google Sheets node settings:
* **Authenticate** with your Google account.
* Select the Drive, Spreadsheet, and Worksheet.
3. Create a blank Google Sheet (e.g., "invoice demo") in your Google account.
4. In the Google Sheets node settings:
* **Authenticate** with your Google account.
* Select the Drive, Spreadsheet, and Worksheet.
 * For **Insert – Cells / Column Values**:
* Click **Manual List** and use the data viewer to pick fields from the extracted file (e.g., vendor name, invoice amount, invoice number).
* Click **Add** after each field selection.
* **Key Column** – enter `A` so rows append from the first column.
5. Click **Test run Node** to push data into the sheet, then check Google Sheets for results.
***
## Next Steps
Route emails from your Outlook mailbox directly into Cloudsquid projects.
Trigger extraction and reconciliation programmatically via the REST API.
* For **Insert – Cells / Column Values**:
* Click **Manual List** and use the data viewer to pick fields from the extracted file (e.g., vendor name, invoice amount, invoice number).
* Click **Add** after each field selection.
* **Key Column** – enter `A` so rows append from the first column.
5. Click **Test run Node** to push data into the sheet, then check Google Sheets for results.
***
## Next Steps
Route emails from your Outlook mailbox directly into Cloudsquid projects.
Trigger extraction and reconciliation programmatically via the REST API.